Manually Provision a Grandstream ATA

Manually register a Grandstream HT801 or similar HT-series ATA with 2talk SIP settings.

Use this guide to manually register a Grandstream HT801 analog telephone adapter (ATA) with 2talk. The same settings usually apply to similar Grandstream HT-series ATAs, although menu names may vary by model and firmware version.

Before you start

  • Connect the ATA to power and to your network.
  • Connect an analog phone to the ATA phone port.
  • Have the 2talk phone number and SIP password ready.

Find the ATA IP address

By default, the HT801 receives an IP address from your router or DHCP server. You can hear the current IP address from the ATA voice menu.

  1. Pick up the phone connected to the HT801.
  2. Press *** to open the interactive voice response menu.
  3. Wait until you hear Enter the menu option.
  4. Press 02. The ATA reads the current IP address aloud.

Open the web interface

  1. Connect your computer to the same network as the ATA.
  2. Open a web browser.
  3. Enter the ATA IP address in the browser address bar.
  4. Sign in to the web configuration menu. The default login is usually admin for both the username and password.

If the page does not load, confirm that your computer and the ATA are on the same local network.

Configure the FXS port

Open the FXS Port tab and enter the 2talk registration settings for the phone port.

  • Primary SIP Server: plus.2talk.com
  • SIP User ID: Your full 2talk phone number
  • Authenticate ID: Your full 2talk phone number
  • Authenticate Password: The SIP password for the number

Grandstream FXS port settings

Save and restart

  1. Click Save or Apply.
  2. Restart the ATA.
  3. Wait for the ATA to come back online and register with 2talk.

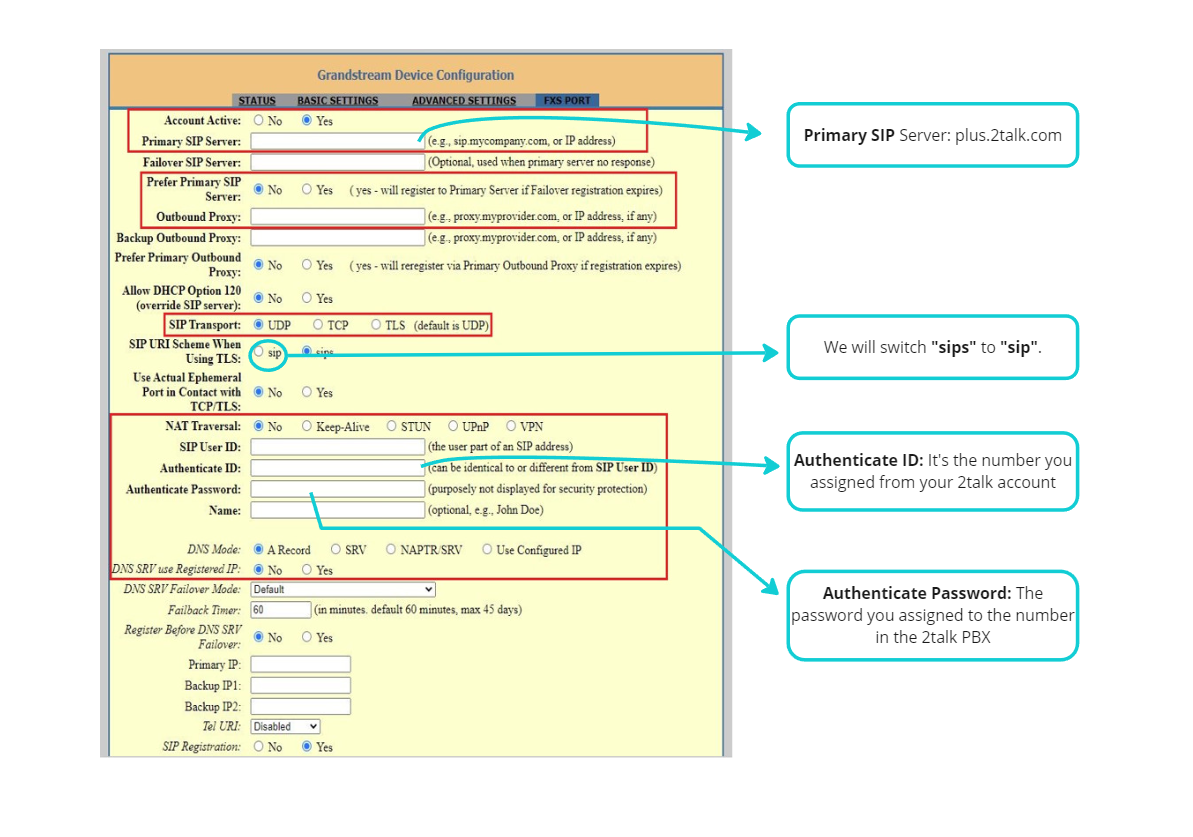
If the line does not register, recheck the phone number, SIP password, and proxy value.

Table of Contents