Provision a Yealink Device

Provision supported Yealink phones so they automatically download assigned 2talk numbers and feature settings.

Yealink Device Provisioning lets 2talk push configuration to supported Yealink phones. After the phone is added and rebooted, it downloads the assigned number and feature settings automatically.

Add a Yealink phone

  1. Log in to your 2talk account.
  2. Go to Tools > Device Provisioning.
  3. Click Add Device.
  4. Select Yealink as the device type.
  5. Select the phone number to assign.
  6. Enter a device name.
  7. Enter the phone’s MAC address.
  8. Set the time zone and time format.
  9. Configure line keys or feature keys if needed.
  10. Click Save.

Restart the phone after saving. Future changes made in Device Provisioning may restart the phone automatically.

Yealink provisioning

Bulk upload Yealink phones

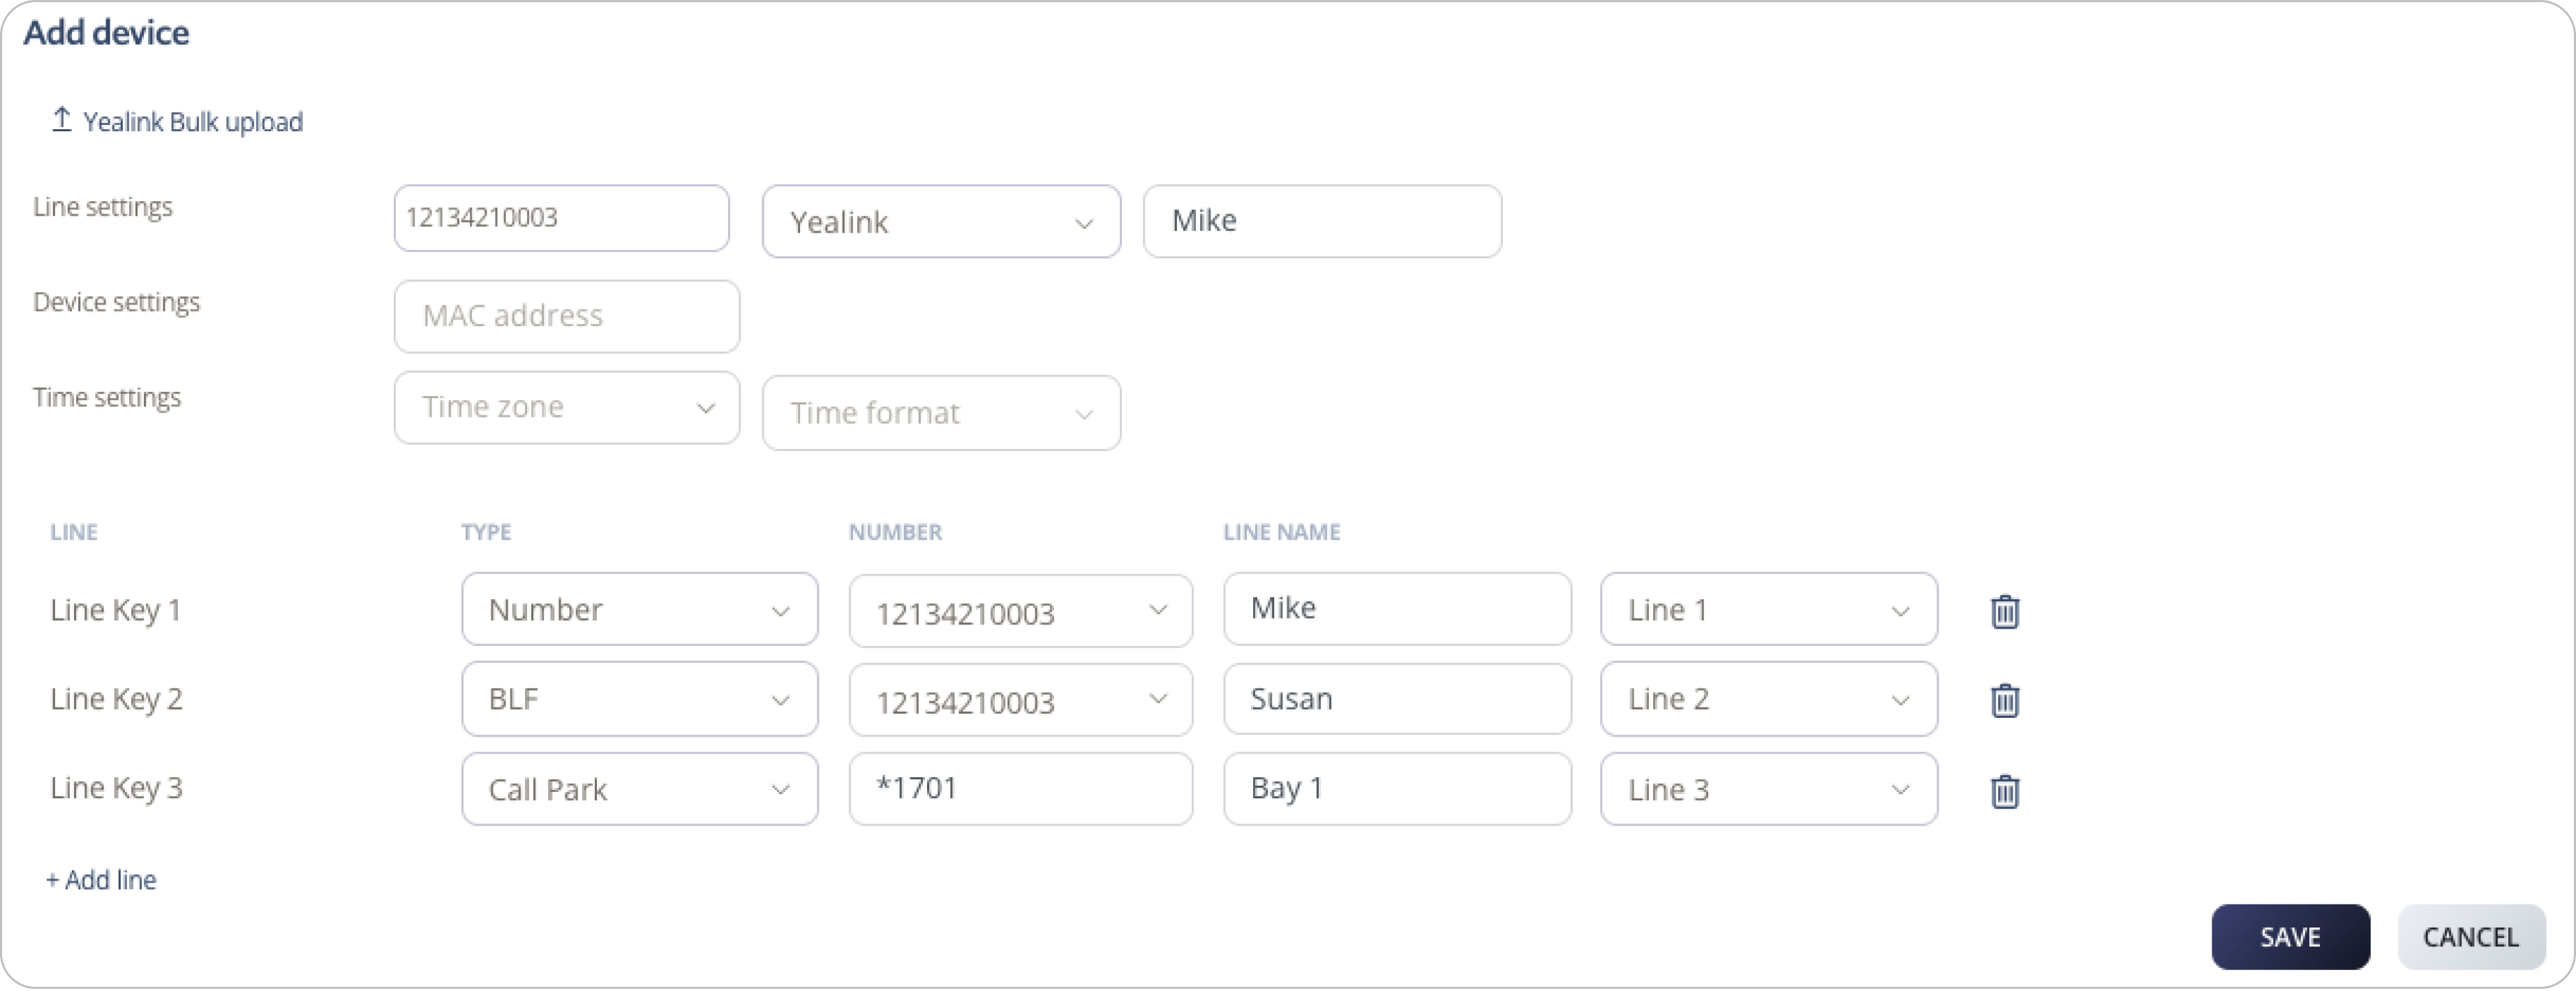
Use bulk upload when you need to provision multiple Yealink phones from a spreadsheet.

  1. Click Yealink bulk upload.
  2. Click Download template.
  3. Open the template.
  4. Enter each phone’s MAC address, number, and label.
  5. Save the file.
  6. Return to Yealink bulk upload.
  7. Click Choose File, select the completed file, and click Upload.
  8. Check the notification email for success or failure details.

How Yealink provisioning works

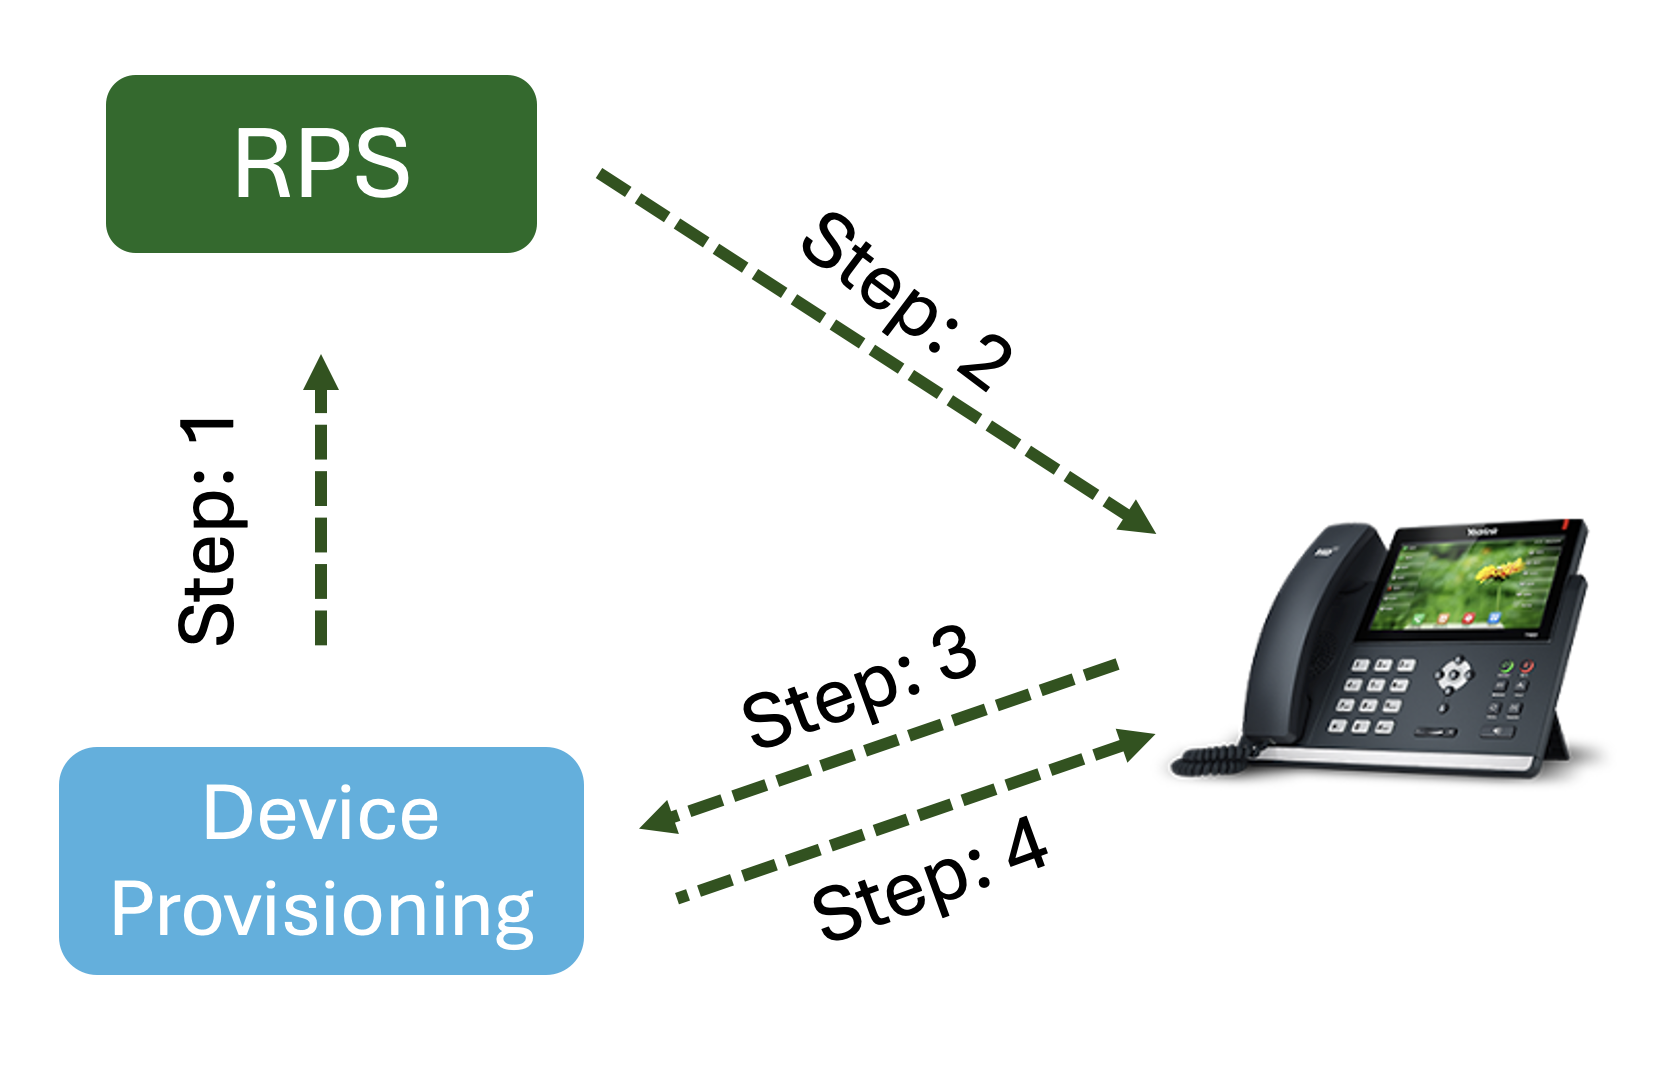
2talk integrates with Yealink RPS. When a phone’s MAC address is added to Device Provisioning, Yealink can redirect the phone to the 2talk provisioning URL after reboot. The phone then downloads its assigned configuration.

Table of Contents