Trunking

Configure trunking so a registered PBX can use one trunking number while presenting other caller IDs.

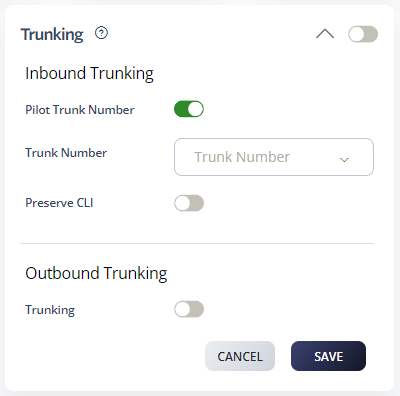
Trunking lets a registered PBX use one trunking number while presenting caller ID for other numbers on the same account. Use trunking when your PBX requires SIP registration and cannot use static-IP SIP peering.

Set up Trunking

  1. Log in to your 2talk account.
  2. Go to Switchboard.
  3. Select the trunking number.
  4. Go to Preferences > Trunking.
  5. Set the Inbound Trunking Pilot Number.
  6. Click Save.

Trunking settings

Trunking options

  • Inbound trunking: Routes multiple numbers to one registered trunking number.
  • Outbound trunking: Lets the PBX present caller ID for approved numbers on the account while using one registered trunk.

Notes

  • All outbound caller ID numbers must be allowed on the same account or group as the trunking number.
  • Some PBX systems use Display Name or P-Asserted-Identity headers to present caller ID.
  • P-Asserted-Identity support depends on your PBX configuration.
Table of Contents